To schedule backups with the Backup utility, you must have an understanding of the
Backups utility and how to perform a standard backup.
Procedure
-
Double-click
 Maintenance on your desktop.
-
In the Maintenance window, select and double-click
 Backup.
-
In the HCN Backup window, select the
Schedule tab to record times for conducting automated
backups.
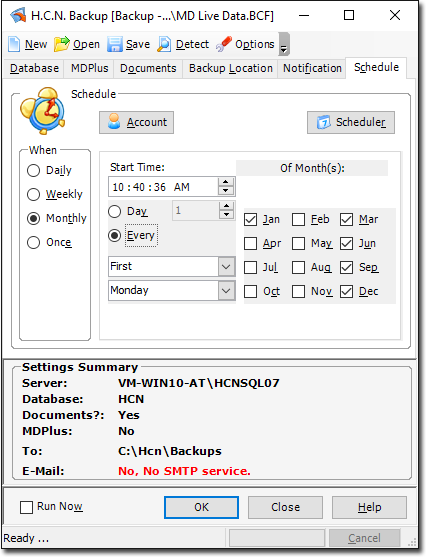
This tab is available only after deselecting Run Now at the
bottom-left of the window.
-
Click Account to register the schedule to a particular user
account, where only the user that created the scheduled task can change or delete the
details of that particular scheduled task. The Task Account also allows you to
provide login details. The scheduler then logs in using these and allows access to
resources based on your access permissions.
-
Click Scheduler to access Microsoft's Task Scheduler
utility. By doing so you will be able to check if and when you have any other tasks
scheduled, allowing you to coordinate your HCN Backups around these other tasks. If
you find an existing backup task, consider modifying it.
- Select from the 'When' options to set the schedule for Daily, Weekly, Monthly
or Once-only operation. After you have made a selection you can edit the
times/days etc. for each type of schedule.
-
Click OK to confirm the changes.
A confirmation prompt is
displayed, either:
- Lock/encrypt the backup file by entering a password, or
- Tick the No Password check box.
-
Click Yes to perform the backup.
-
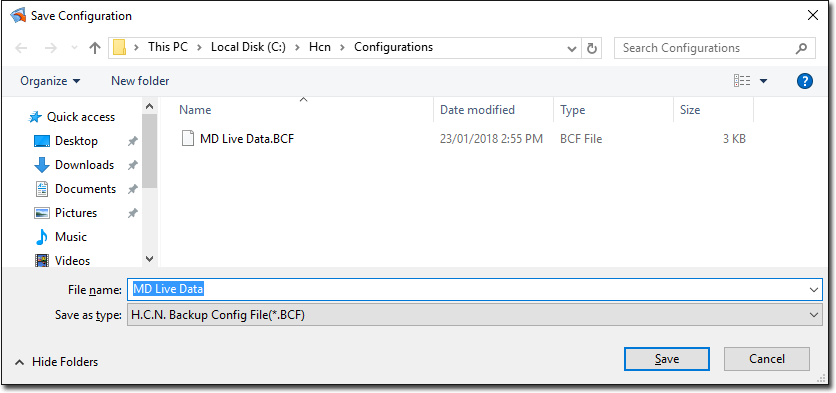
If you have made any changes to the schedule, you will now be prompted to save the
Configuration file.
Results
If you already have a configuration file of the same name, it will be overwritten by the
new configuration file. If you want to keep the old configuration file, rename this
version.
Once the backup has been successfully performed you will be prompted accordingly.