Delete existing configurations
- Open Window Explorer and browse to C:\Hcn\Configurations (this is the default configuration location).
- Delete all files in this folder.
Database Tab (Backup)
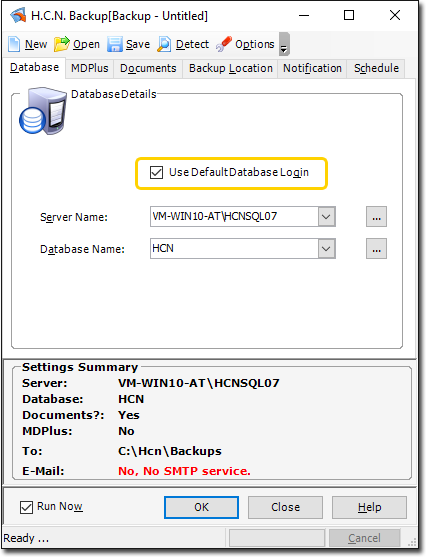
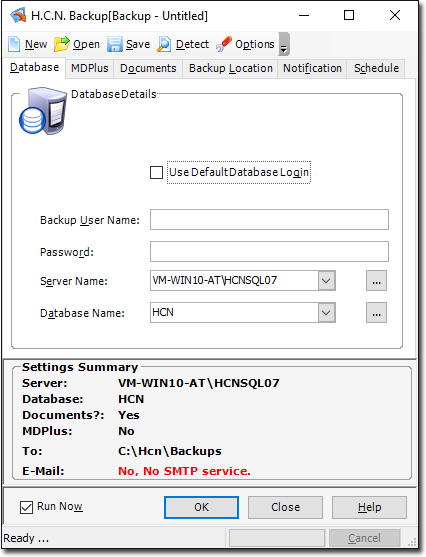
Use the Database tab of MedicalDirector Backup to select the database for back-up.
| Items of interest on the MedicalDirector Backup window | |
|---|---|
| Use Default Database Login checkbox | Enabled by default. |
| Server Name | Allows you to enter or select a server name. If you have
installed a named server instance on your computer, this name is displayed
(or can be selected) in the Server Name field of the Database tab, for
example, SERVERNAME\HCNSQL07. If a default has been installed (no named instance) the Local Server Name field displays (local). |
| Database Name | Allows you to enter or select a database name. |
When the Backup Utility is opened you are presented with the last backup configuration used. When the Backup Utility is opened for the first time it detects your installed MedicalDirector products and automatically configures the settings to backup these appropriately.
Only the last used configuration is loaded if you have already successfully performed a Backup and only if you have run the Backup from this interface. This means if you have only ever run a scheduled Backup, this window will not display the configuration last used.
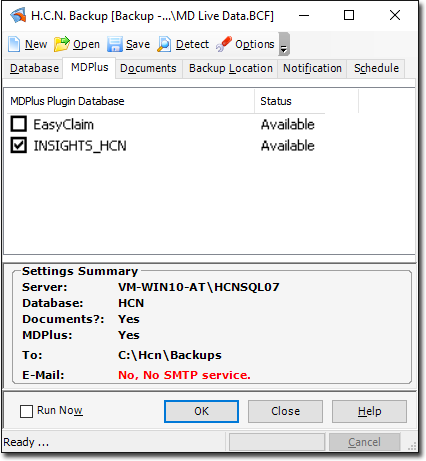
MDPlus tab
- Deselect EasyClaim
Set INSIGHTS_HCN
Documents Tab (Backup)

- Click
 to browse to and select files to add to the backup.
 - Click
 (on the button) to reveal a drop-down menu from
which you can select documents for your various MedicalDirector databases.
(on the button) to reveal a drop-down menu from
which you can select documents for your various MedicalDirector databases.
| Items of interest on this window | |
|---|---|
| Include In Backup check box | Enables/disables the including of documents/folders in the backup. |
|
Allows you to browse for a document or folder to be
included in the backup. Allows you to select other files to add to the backup. Typically, you will want to backup documents associated
with Clinical. To do this, click the |
 |
Highlight a select document type and then click the Remove button to remove it from the list. |
| Clears all documents from the list. | |
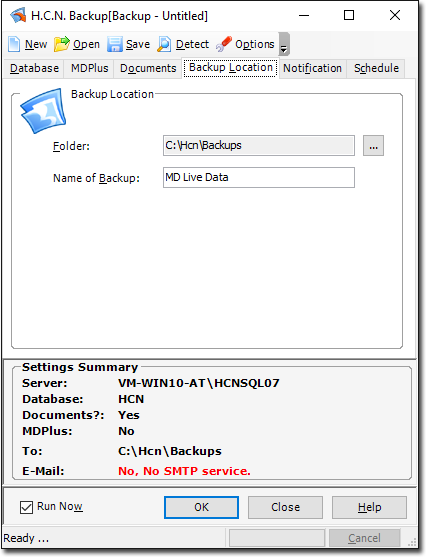
Backup Location Tab (Backup Options)
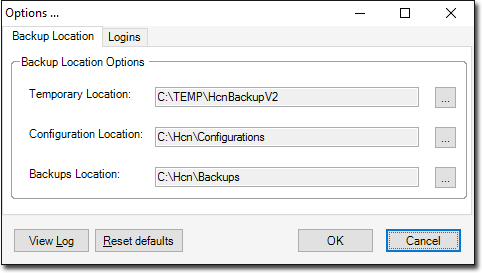
Use the Backup Location tab of Backup Options to change the default settings for the location of your backups and backup configuration files.
- Temporary Location - Where the backup file is processed and generated before being moved to the Backups Location. The space required to generate the backup file is greater than the resulting file itself. Therefore, if space on your Backups drive is limited, it may be necessary to choose different locations for both the temporary file, and the backup file.
- Configuration Location - The configuration file saves all your settings for a given backup. Loading it restores all your settings into the wizard.
- Backups Location - Where the resulting backup file is saved.
Backup Log (Backup Options)
- Click
 on the Backup window. The
Options window appears.
on the Backup window. The
Options window appears.
- Click View Log. The log will open in a separate window. You can print the contents of this secondary window, or save it as a file.
Logins Tab (Backup Options)

For the repair of invalid logins, Windows Service Pack 3 (SP3) is required for both MSDE and SQL Server.
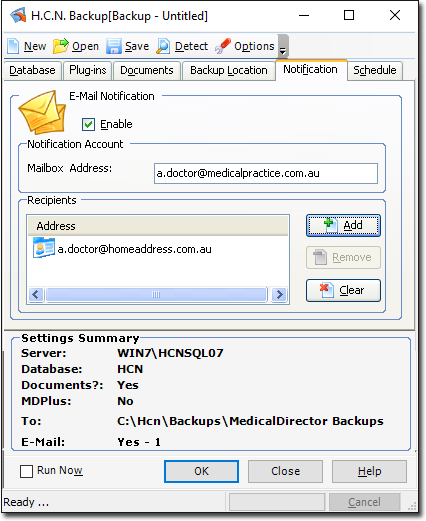
Notification Tab (Backup)
This functionality requires that you have SMTP (Simple Mail Transfer Protocol - the de facto standard for e-mail transmissions across the Internet) installed. You will not be able to access the Notification tab if SMTP is not installed.
If the SMTP Service is not installed you will be prompted accordingly upon opening the MedicalDirector Backup application.
E-mail Notification can only be used when scheduling a backup.
Installing the SMTP Service
Simple Mail Transfer Protocol (SMTP), the de facto standard for e-mail transmissions across the Internet must be installed to have access to Backup Notification functionality. You will not be able to access the Notification tab if SMTP is not installed. If the SMTP Service is not installed you will be prompted accordingly upon opening the MedicalDirector Backup application.
- Within Windows, select . The Windows Control Panel is displayed.
- Locate and double-click the Add or Remove Programs icon
 The Add or Remove Programs
window is displayed.
The Add or Remove Programs
window is displayed. - Click the Add/Remove Windows Components icon
 from the left hand menu. The Windows
Components Wizard appears.
from the left hand menu. The Windows
Components Wizard appears. - Select the Internet Information Services (IIS) check box and click Delete. The Internet Information Services (IIS) window is displayed.
- Select the SMTP Service check box, this will add the other required services and click OK You are returned to the Windows Components window.
- Click Next to continue. The Configuring Components window is displayed and the installation of the SMTP Service begins.
- Click Finish when the installation is successful.
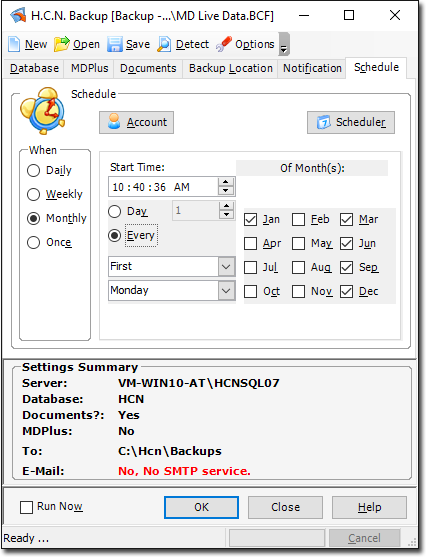
Schedule Tab (Backup)
- Click
 Account to register the schedule to
a particular user account, where only the user that created the scheduled task can
change or delete the details of that particular scheduled task. The Task Account also
allows you to provide login details. The scheduler then logs in using these and
allows access to resources based on your access permissions.
Account to register the schedule to
a particular user account, where only the user that created the scheduled task can
change or delete the details of that particular scheduled task. The Task Account also
allows you to provide login details. The scheduler then logs in using these and
allows access to resources based on your access permissions. - Click
 Scheduler to access Microsoft's Scheduled
Tasks utility. By doing so you will be able to check if and when you have any other
tasks scheduled, allowing you to coordinate your MedicalDirector Backups around these
other tasks.
Scheduler to access Microsoft's Scheduled
Tasks utility. By doing so you will be able to check if and when you have any other
tasks scheduled, allowing you to coordinate your MedicalDirector Backups around these
other tasks. - Select from the 'When' options to set the schedule for Daily, Weekly, Monthly or Once-only operation. After you have made a selection you can edit the times/days etc. for each type of schedule.
Check the backup log file to ensure that your scheduled backup has been successful. The backup log file is called HcnBackupLog.txt, and is saved to root director of your C: drive.