
Adding Patients to the Waiting Room
When a patient arrives at your practice, add them to the Waiting Room.
Procedure
-
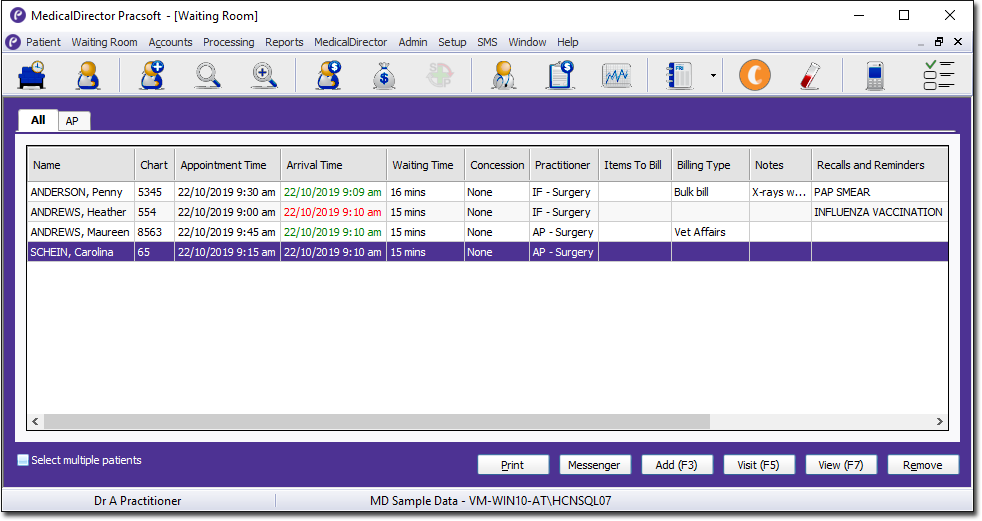
Select the practitioner you want to assign the patient to via a tab towards the top
of the window. In the example image below, the All tab is
selected, showing patients for all practitioners. There are tabs for other
practitioners, including two for Dr. A Practitioner (AP): one for surgery visits and
another for radiology visits.
- If you select a practitioner's tab and add a patient to the Waiting Room, the patient will be assigned to that practitioner regardless of their default practitioner.
- If the All tab is selected, the patient will be assigned to their default practitioner.
- If the All tab is selected and the patient does not have a default practitioner recorded, the patient will be assigned to the default practitioner specified in User Settings.
- These tabs are enabled/disabled via the Registered Practitioner window.
-
-
If you are using Clinical and the patient has any due recalls, the Patient
Attendance window is displayed.
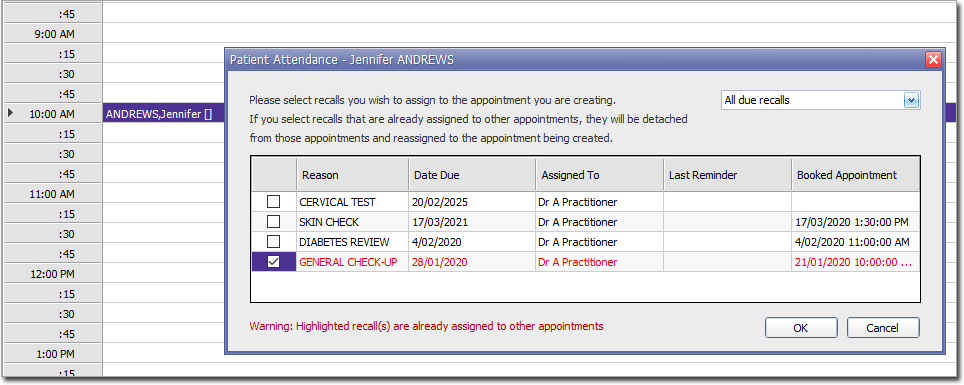
In the Patient Attendance window, if the patient is attending for a recall, select that recall. This information is saved back to the patient's record in Clinical.The default view displays all active recalls that are due within the last three months, or today, or one month from today.
The Reason column is displayed only to users with permission to view it, granted by setting Show Recall Reasons in User Details.