Transfer your backed-up data to a new server and configure it.
Before you begin
You must back up your MedicalDirector Pracsoft data from the old server.
For more information, see On the Old Server.
About this task
Install the MedicalDirector Pracsoft application and transfer
your data to the new server.
Procedure
To configure a new server:
-
Install MedicalDirector Pracsoft
application:
-
Install the software using the latest full version release disc or ISO.
-
Apply any application updates to match the current version installed on the
workstations:
-
Apply MDref updates to match the workstation's current MDref version.
Note: If the installed version is no longer available for
download via MedicalDirector Automatic Update or from
the MedicalDirector website, you
will need to manually update the server and workstations to the current
version.
-
Restore the HCN Data:
-
Copy the backup from the external media to the local machine.
-
Open HCN Maintenance.
-
Select .
-
Run the
 Restore utility.
-
For sites, restore manually as follows:
-
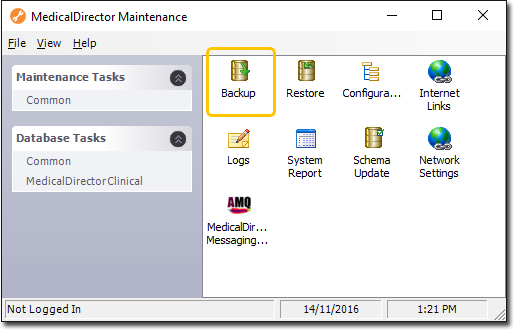
Open MedicalDirector Maintenance.
-
Select .
-
Open the
 Backup utility.
-
Press the
 ellipse menu next to Database
Name.
ellipse menu next to Database
Name.
-
From the list, choose the database that requires SQL Logins to be repaired or
reported on.
Note: To repair HCN_CONTENT
database, in the Database field, type
HCN_CONTENT.
-
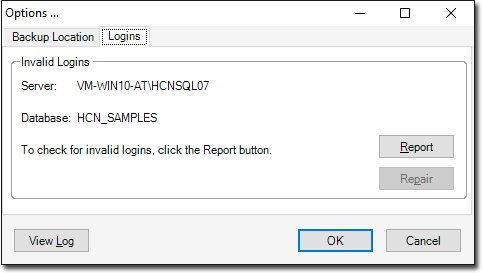
Click Options.
-
In the Options panel, select the
Logins tab.
-
Click Report.
- If there are any SQL login's to repair, the
Repair button will become active and the
message text will display that X invalid
logins were found and require attention. Click the repair button to
fix the logins.
- To fix the logins, click Repair.
- If any errors are experienced during the reporting of invalid logins,
contact MedicalDirector
Customer Service.
-
Repeat the process for all databases
that require their SQL Logins to be checked.
-
Reset the ManageEzy paths:
-
Open HCN Maintenance and select Maintenance
Tasks.
-
Run the
 Configuration utility.
-
In the Configuration list, select MD Live
Data and click Update.
-
When prompting, click the Use UNC Path button.
-
To restore the MedicalDirector Pracsoft
HIC.PSI, copy the hic.psi file from the external media to the
following location:
- For 32 Bit OS - C:\Program Files\Common Files\PKI
- For 64 Bit OS - C:\Program Files x86\Common
Files\PKI
-
Configure Schedule Document Import (SDI):
-
Open HCN Maintenance.
-
Select .
-
Run the
 Manage Communications utility.
-
Set the Import Database to HCN Live
Data.
-
Set up Data Transfer tab, ensure the following options
are selected for SDI and Manual:
- MD Messages
- MDX
- MD Directory
Tip: You may require to setup more
configurations in the future, after you have installed your pathology
software.
-
Open the MedicalDirector Pracsoft
application, register MD Exchange:
-
Select .
-
To complete the registration, follow the prompts.
-
Configure MedicalDirector Pracsoft for
Online Claiming:
-
Open the MedicalDirector Pracsoft
application.
If you are experienced with any error related to online claiming, click
OK to the prompt.
-
Select tab.
-
In the Store location field, click the Ellipse icon and browse to the location of the
hic.psi on the New Server.
-
Click Save and close the MedicalDirector Pracsoft application.
-
Reopen the MedicalDirector Pracsoft
application.
Tip: It can now open without errors. However,
if any errors persist, contact MedicalDirector Customer Service on
1300 300 161.
Results
A new server is successfully configured.
What to do next
After configuring your new server, configure the
workstations. For more information about configuring workstations, see On the Workstations.