Activating and Configuring the Link File Processor
Before you begin
The Link File Processor is initially activated via MedicalDirector Maintenance, and once active runs as a Windows Service. Configuration of the Link File Processor is managed via the LFP Service Manager. Configuration requires your MedicalDirector User Name and password.
Procedure
-
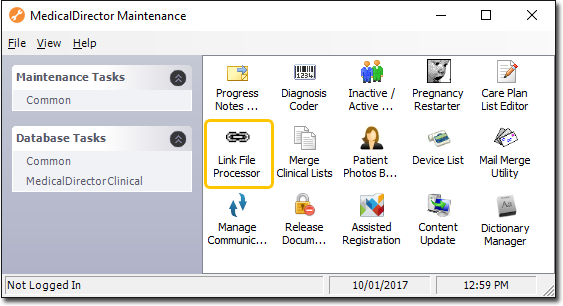
Locate and double-click the MedicalDirector Maintenance icon

on your desktop. The window appears. -
Select the menu item.
-
Double-click

The first time you run the LFP Service Manager utility, you will be prompted that you must configure it before it can be activated.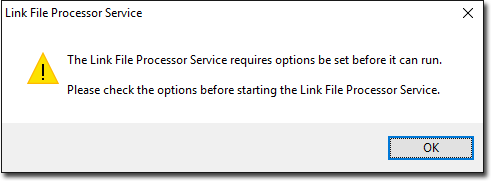
-
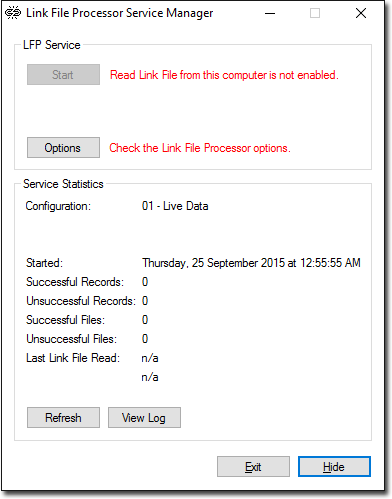
Click OK The LFP Service Manager appears. Initially, the LFP Service Manager will indicate that it has failed to start. This is because it requires you configure a few settings first. Continue now to Step 5.
-
Click

You will be prompted select which database configuration you want to configure, and to enter your MedicalDirector User Name and password for the selected configuration. The configuration you select here should be the one you want to use the Link File Processor with.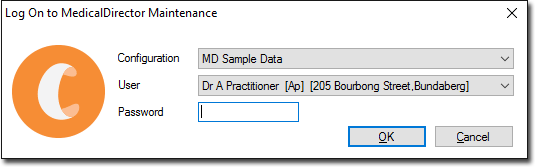
-
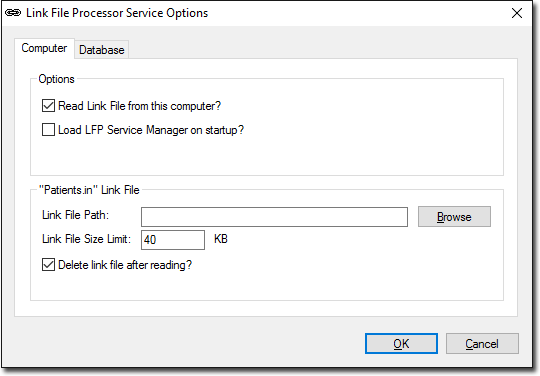
Click OK The Link File Processor Service Options window appears. Select the Computer tab. From this tab you will configure settings for the computer you are working at i.e. each computer can be configured differently.
-
Consider the following options:
- Ensure that the Read Link File from this Computer check box is ticked for linking to function. Removing this tick will deactivate the Link File Processor.
- Indicate whether you want to have the Link File Processor Service Manager loaded when Windows starts, on this computer.
- Click

to select the path to the link file. This path should match the output path you have configured in your third-party billing package. - Enter the File Size Limit. If the file is larger than the size indicated here, the file will not be imported.
- Tick the Delete Link File After Reading check box to delete the link file after reading it. The Link File should only be deleted if your billing product requires this.
-
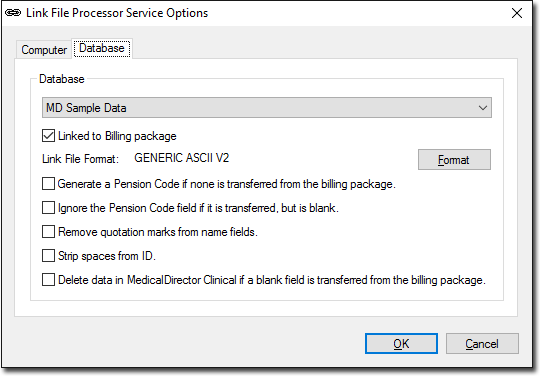
Select the Database tab. From this tab you will configure settings for the MedicalDirector database(s) available to you. Settings made here are global.
-
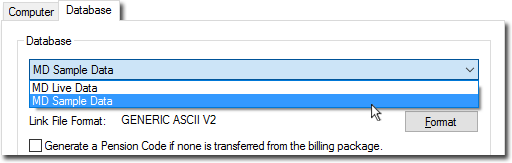
(Optional) When you access this tab, the database selected will be that which you chose when you first opened the Options window. If you want to configure a different database to that shown, select it now via the Database drop-down menu. If you select a different database, you will be prompted to enter your username and password for that database. It is important to note that the database you select here will be the database affected by the Link File Processor - ensure you select your intended database.
-
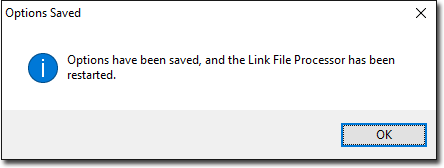
Click OK to confirm your settings. You will be prompted upon successful saving of your selections.
-
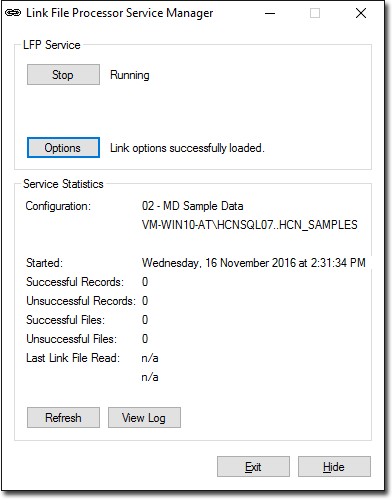
Click OK You will be returned to the Link File Processor Service Manager. It should now indicate that the service is running.
-
Click

to hide the Link File Processor Service Manager. It will remain active, and can be accessed via the
icon in your Windows System Tray.