Send an SMS Message to a Patient from the Appointment Book
Before you begin
Procedure
-
Either:
- Select a patient's appointment in the Appointment Book to send the message to,
and then click
 Send SMS to Patient.
 - Right-click a patient's appointment in the Appointment Book, and selecting Send SMS
Reminder from the menu. The Send SMS
Reminders window appears. You are initially presented with the
Review Recipients tab. Confirm that you have selected
the correct patient/s to message. Patients who have elected to opt-out of SMS Messaging
will be excluded from being sent reminders, despite them appearing in this
list. You can view a log file to determine
which patients were not sent SMS reminders, and why.
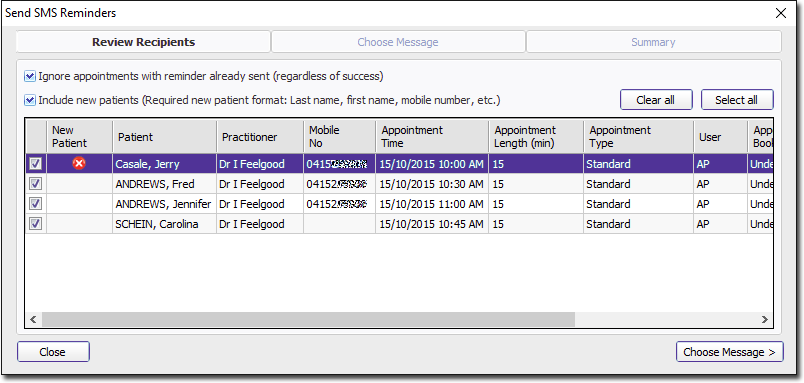
Notes:- Indicate whether you want to ignore appointments that have already been sent a reminder. Note that this ignores such appointments regardless of whether any previous attempts to send reminders failed. For success/failure notifications, see SMS Logs.
- Indicate whether you want to include new patients. New Patients are
those that were entered directly into the Appointment Book before being
added to Pracsoft itself and are identified with a
 mark in the New Patient column. New patients
can be sent SMS messages, provided they have been entered into the
Appointment Book using the format of Surname, First Name,
Mobile Number, (followed by any other details, provided each is
separated by a comma). For information about handling new
patients added directly to the Appointment Book, see Linking Appointments to
Patients.
mark in the New Patient column. New patients
can be sent SMS messages, provided they have been entered into the
Appointment Book using the format of Surname, First Name,
Mobile Number, (followed by any other details, provided each is
separated by a comma). For information about handling new
patients added directly to the Appointment Book, see Linking Appointments to
Patients.
- Select a patient's appointment in the Appointment Book to send the message to,
and then click
-
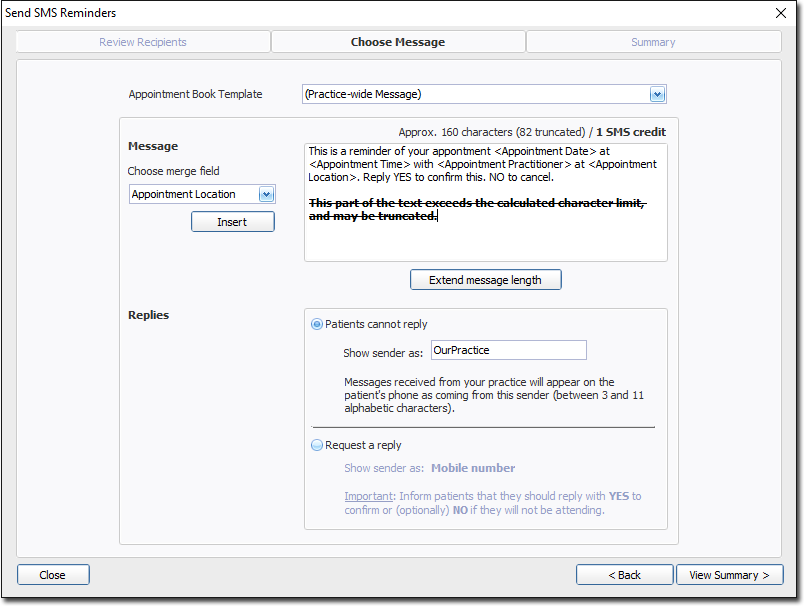
Click Choose Message to proceed. You are presented with the
Choose Message tab.
- (optional) Select a message template to base this message on via the Appointment Book Template drop-down menu. You will be able to modify the message if you want.
- Enter your message into the Message field provided,
using a combination of;
- Free-typing into the field.
- Inserting field codes. Field codes act as place holders for information, and are replaced automatically by real data when you send the message. For example, if you select the field code <Patient Given Name>, this will insert the given name of the patient for whom you are creating the message.If you want to use field codes, insert them via the Choose Merge Field drop-down list provided on this window to avoid typos.
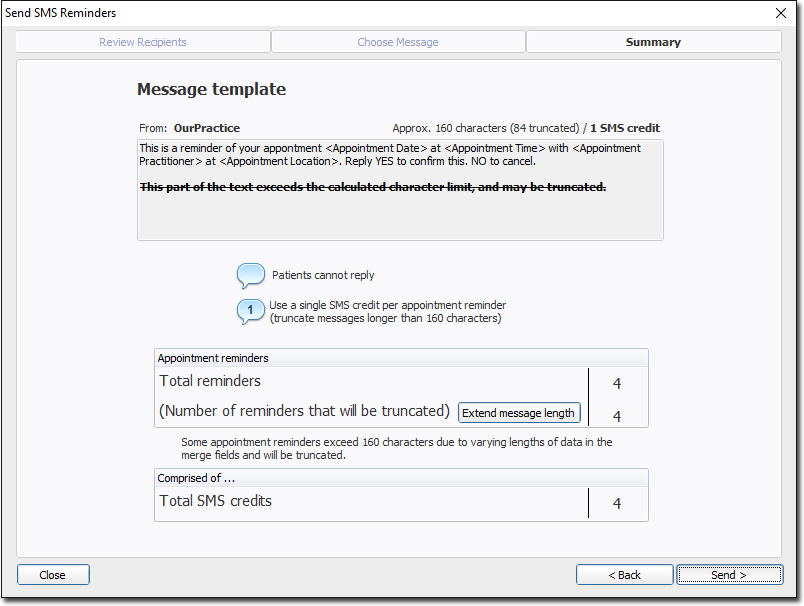
- The message field accepts 160 characters - the capacity of one standard SMS message. Any text you type beyond this 160-character limit will be displayed with a strike-through to indicate that it will not be sent (as shown in the example below). To disable this character limit, click Extend message length. Each additional set of 160 characters will incur a cost to send.
- The number of characters you have used, and the estimated cost in SMS credits
is displayed at top-right of the message field.
-
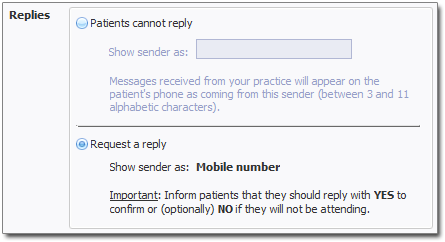
Indicate whether patients can reply i.e. if you want to request that they reply to your message in order to confirm their attendance at the appointment.
- If you elect that patients cannot reply, enter a description for the SMS sender e.g. "OUR_PRACTICE"
- If you elect that patients can reply, it is recommended that you indicate this in the message body, providing instructions e.g. "Reply YES to confirm. NO to decline. STOP to opt-out of further SMS messages."
-
Click View Summary to continue. You are presented with the
Summary tab, and a summary of the SMS message you have
prepared for sending.